So, I was on the hunt for a couple of really personal graduation gifts for two special girls graduation from college.
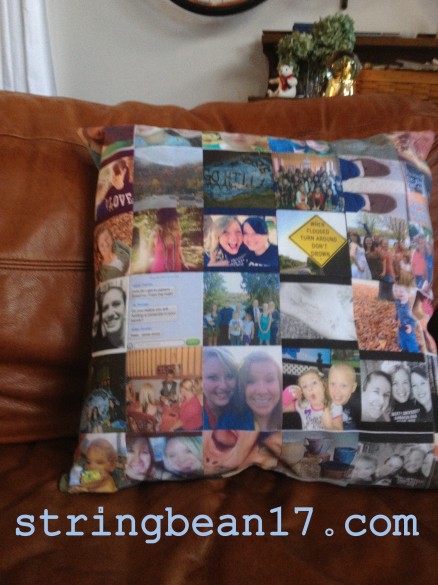 make your own pillow using Instagram Pictures DIY stringbean17.com
I saw these Instagram gifts on Pinterest, and since I have worked with photos on fabric before and I am a cheapskate, I thought, I could make that! I would say that this is a moderately involved process if you have not used a slideshow program. If you have a sewing machine and can sew a straight(ish) line, this should be a fine project. I spent several hours doing the picture/computer part and another hour or two sewing two pillows….
Materials Needed:
- 1 pillow insert
- fabric printer paper-this can be found at a fabric/craft store and comes in different size packages. I have used several brands and they all seem to work very nicely, just takes some adjustments with each brand.
- printer
- computer
- scissors, thread, zipper (about 14-18 inch) if putting one in the pillow
- sewing machine (a basic one works fine!)
- fabric for back if you only do pictures on one side. If you are purchasing fabric buy a little more than 1/2 yard, if fabric is more than 36 inches wide, you should be able to get two backs from this!
The first thing I did was ask my niece, “pocketbook, bag, small throw or pillow?” And pillow was the answer! So I went to the craft store and bought a pillow insert. I got 18 x 18, because I thought this would allow me to use lots of pictures and look nice on either a bed or couch.
Then I stalked the girls Instagram albums on Facebook and downloaded about 40 pictures I liked. I tried to get a variety of serious, funny, lights and darks…I went to my nieces page and found her pictures, she has an instagram album. As I went through the album, there is an option button. When you click on it, one of the options is download. I just downloaded the ones I liked.
Once I had the pictures, I opened up my slideshow program on my computer and made slides of the pictures I wanted to use. I use open office that I downloaded for free. It worked great! If you are not sure how to use the slide program, ask any kid over 12….all of my kids learned at school how to do slide presentations! I ended up making six slides with six pictures on each one. I made each picture 3.1 inch square and since my printer cannot print all the pictures at once on the fabric, I chose to put four pictures together for the four center squares, then did sets of two to go around the edges.
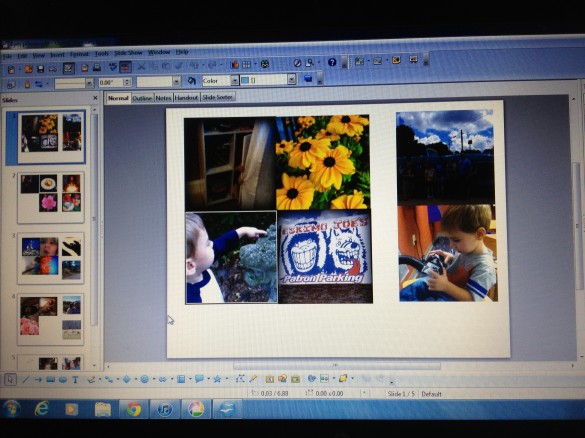
I then chose four for the corners and left white space for seam allowance. Sounds tricky, but I wanted to get the most out of my photo paper, and have a pleasing visual. At first I was just going to print 6 sheets of six pictures and sew them together. That would work perfectly fine. If you are a beginner at sewing, I would recommend that option. One of my daughters wanted me to make it more complicated. I feel like it is nice to have more seams, but they do not show very much and an easier arrangement would be perfect, too!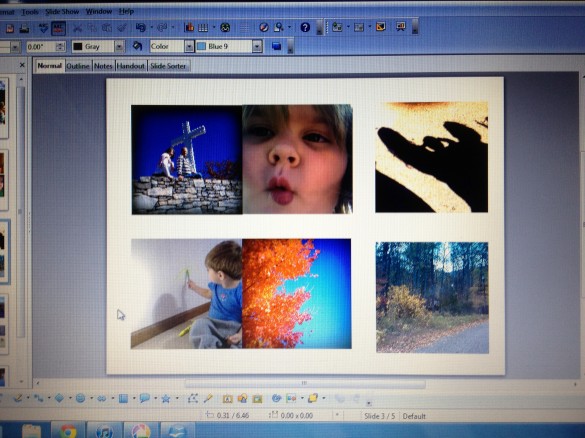
The fun part to me is printing on the fabric! I love watching something flat become textured and alive. Depending on your photo paper, follow printing instructions and print one page at a time so that you can see how it turns out and make sure your pictures are like you want! One kind of photo fabric I use messes up if I leave the backing paper on, one does not. (Trial and error!!)
Now, after rinsing, drying and setting the fabric, I cut the pictures apart and arrange. Play around with your arrangement both on the computer and after you have the fabric printed…you may like something different than you first envisioned.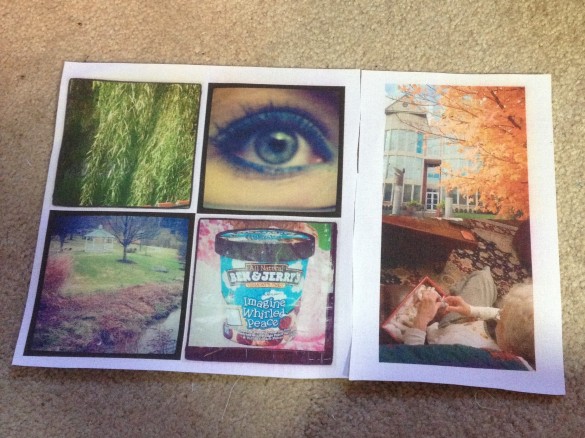
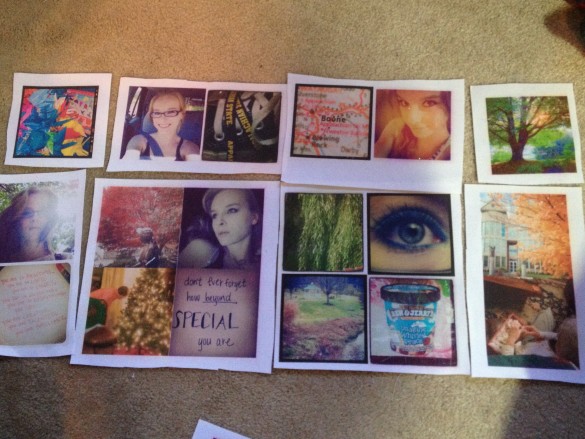
After getting the arrangement like I want, I sew each row together, press seams (very important, don’t skip this, it just makes everything better), and then see each row together.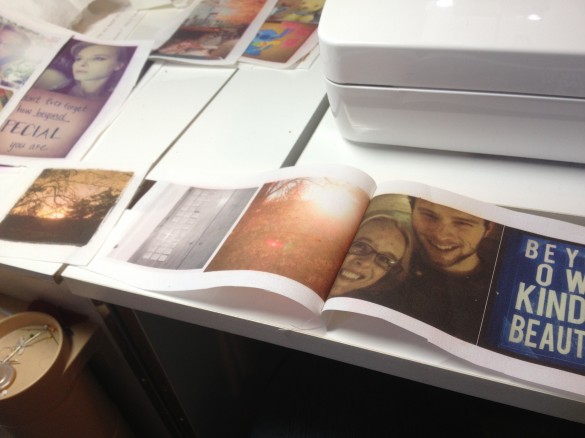
Make sure you don’t sew some pictures upside down (believe me, it happens) and press your whole pillow top one more time. As you can see here, the seams do not show up much.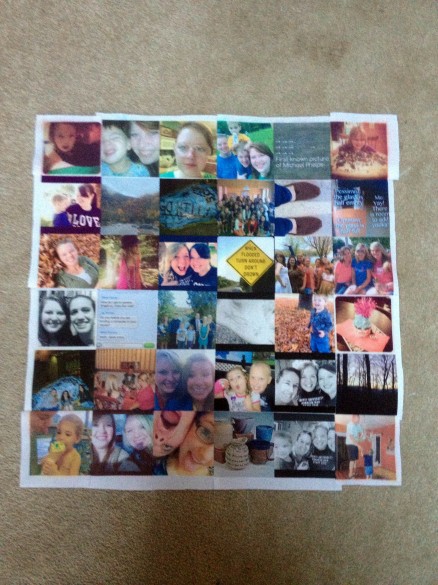
Now, decide whether you want to have a “flap” back or a zipper. I am going with zippers. You could also just sew back on and stuff the pillow. I want the girls to be able to take it off and wash it!
For a great tutorial on putting in a zipper, check out this one from Design Sponge! If you want to add a flap style back, this gives the basics on E-How. the third way you can do this is to just leave an opening and then, after your insert is in, whip stitch the bottom closed. You will have to cut open your stitches if you need to take the cover off if you do it this way. (I have done it this way many times!)
Clip corners, then turn right side out. Really smooth out seams and press before inserting your pillow form.
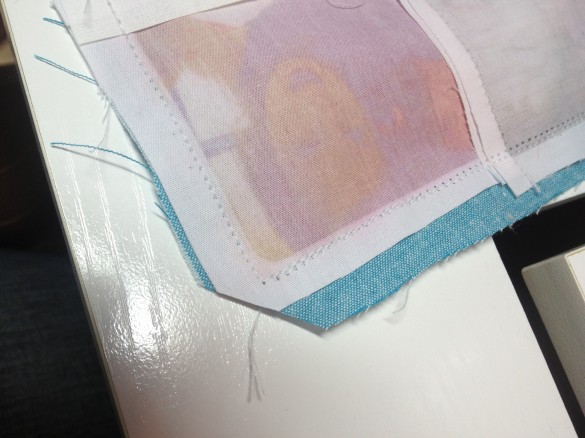 As you can see, I am not the neatest at trimming everything really straight. It does help with piecing things together, though!
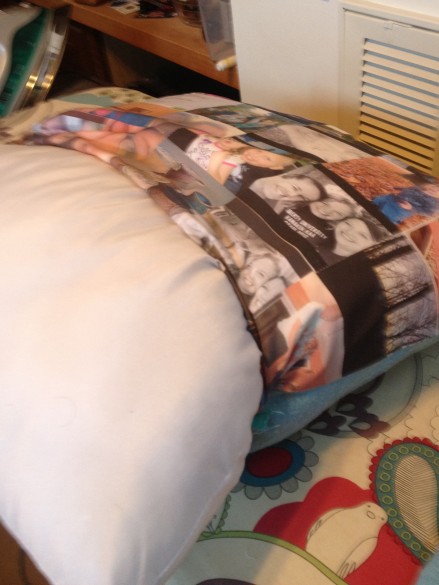
Now, grab a cup of coffee, sit back and enjoy your awesomeness. That is, until someone else sees your pillow and you are asked to make another one. Here is the finished pillow one more time!


{ 16 comments… read them below or add one }
I looove it! You are so talented. Miss having you a little close to me but our blogs and social media will have to do for now. Love you and merry Christmas!
Thanks Cintia! I miss you too!love watching your family grow on Instagram, though! Social media is awesome. Merry Christmas to you, too!
I LOVE LOVE LOVE this. Question, Do I need a sewing machine for this?
Angela,
I am so glad you love it! Me too! I am planning my next ones, too. I am going to add sewing machine to my list of supplies. I think you could make a small pillow and sew it together by hand, but it would be time consuming to do it without a machine. If you don’t have one, talk to a friend who has one. Maybe she would like one too, and you can work together and each get a pillow out of the deal! I first started sewing with a friend making matching baby clothes for our kids!
This is so cool! How much did this cost you per pillow and did you decide to put pictures on both sides?
Mariah,
Those are great questions! I only put pictures on one side, but think it would be cute to do them on both sides.
As far as cost goes, they were probably close to what having one made would cost. I bought large pillow form for about 12.00. I had the fabric to go through my printer, but a pack of that is between 10-15 dollars, I got six pictures on each page. I had the zippers and backing fabric left over from other projects, so that didn’t cost me anything. I would estimate about $20 worth of materials for one pillow. I know Pinterest shows making your own fabric to run through the printer, but I have not been brave enough to try that!
Let me know if you make some!
I think if you buy the fabric paper or the pillow insert with coupons from one of the craft stores, or use one that you have around the house, this would end up costing a lot less than the ones you can order online. The cool thing, too, is once you have made one, you can make at least one more with the pack of photo fabric, so that helps with the cost.
Thanks for commenting! I sent you an email too!
Kym
Haha yeah, making my own fabric might be pushing it for me! I think I will try to make one soon before I leave for college. Anyone I know would be psyched to get this as a gift. Good call with the coupons; craft stores almost always have some kind of coupon out there. I knew there had to be some way to make this cool pillow on your own, so I am so glad I found your blog! Thanks a bunch for the detailed steps. I’ll let you know when I make one!
Sounds great! I would love to know how yours turns out! Please let me know if I need to change any directions!!
something uncommonly weighty about the get of the ethical auriaoogtbphy: that it is based on a corporation in the fitful and on a willingness to be exposed; it's based on being more like a spy than like a sparkler, something rather tenuous, but whose extremely item beauty is inseparable from that fragility.
I really want to try and make a bunch of these for Christmas as gifts, I love sewing. Question though, Is it actual fabric that you run through the printer, or is it paper that you iron on the material once it has been printed?
kaila,
I use the fabric that you run through your printer. It is kindof expensive, but then I just sew it in! I have done lots of projects with it, and it washes fairly well! I look for coupons and buy the stuff on sale! I find that the kind on really stiff paper is easier to feed through one sheet at a time and I kind of help it through. To test a sheet, just print a very small line or something right down the edge to see how you need it to feed, and still be able to use the paper for pictures!
Hi! I completely adore this project and plan on making one very soon. What is the name of the fabric printer paper you used for this particular project? I have looked at a few different brands in the store but your pictures look as if they have excellent quality and I would like to work with the same kind if possible. Again, I LOVE this project and how cheap it is! I looked at other sites that mass produce these and they are anywhere from $60-$100!! I have sewing skills though and figured this would be more meaningful if I made it myself. I know you posted this almost a year ago but hopefully you could recall the name?
Thanks for your time!!
Hi, I was wondering if you were able to sell a custom made cushion exactly like that. I’ve been looking for something like that for a while now but I haven’t found anything that looks that great.
Does anyone know where I could order custom photo pillows like this? What a wonderful anniversary or graduation gift!
Hi!
I was wondering if you have to use Instagram pictures. I have a bunch of pictures from years of going to the beach with friends that I would like to make into gifts. Do you have any suggestions on how I can make this happen?
By the way, I wanted to know if you are from North Carolina? I noticed that you had a bucket list for there and also a file for Maggie Valley! I am, so I was just curious if you live in the state or just get to visit.
Thank you!
Melissa
Melissa,
I think you can use any pictures you want! I have used the photo paper for many different projects, and the great thing about the fabric is that you can size the pictures however you want!
I spent 8 years in Maggie Valley and LOVE it! 🙂 Now, I just get to visit!
Thanks for your comment and I hope that helps!
{ 1 trackback }